how-to-make-ice-cream-with-a-kitchenaid-mixer

Homemade Delights: How to Make Ice Cream with a KitchenAid Mixer

Making ice cream from scratch is easier than you think with the right equipment. Ice cream makers can be expensive, but did you know you can use a KitchenAid standing mixer to make smooth and creamy ice cream right in your own kitchen?

With some simple ingredients, a little patience, and a few handy gadgets, you can create artisanal frozen treats to impress your family and friends. Read on to learn the step-by-step method for making ice cream with a KitchenAid mixer.

Why Make Homemade Ice Cream?

Store-bought ice cream is convenient, but homemade has some key advantages:

  • Control the quality. You can select the highest quality dairy, fruits, nuts, and more. No preservatives or stabilizers needed.
  • Customize flavors. Mix and match your favorite ingredients. The possibilities are endless.
  • Healthier options. Make ice cream with lower fat and sugar or use alternative milks.
  • Impress your guests. Serving homemade ice cream is guaranteed to delight.
  • Save money. Homemade costs a fraction per serving compared to store-bought.

With the satisfaction of creating your own frozen treats, the extra effort is well worth it.

KitchenAid Ice Cream Maker: For Your Kitchen - The Bosch Mixer Superstore

Ice Cream Science Basics

Before getting into the how-to, let’s do a quick overview of the science behind ice cream making:

  • Emulsification – This is the process of dispersing tiny fat droplets throughout the liquid base. It creates a smooth consistency.
  • Aeration – Whipping air into the ice cream base is called aeration. It makes the texture light.
  • Freezing – Rapid freezing is crucial for small ice crystals and a creamy texture. The KitchenAid bowl makes this easy.
  • Sugar – Sugar lowers the freezing point so the ice cream doesn’t freeze rock solid. It also balances flavor.
  • Fat – Dairy fat gives ice cream its characteristic rich taste and smooth mouthfeel.
  • Salt – A pinch of salt enhances flavor.

With these principles in mind, let’s start making ice cream!

KitchenAid® Stand Mixer Ice Cream Maker Attachment | Williams Sonoma

Ice Cream Ingredients

To make about 1 quart of ice cream, you will need:

  • 2 cups heavy cream or half-and-half
  • 1⁄2 cup sugar
  • Pinch of salt
  • 1-2 teaspoons vanilla extract
  • Flavorings of your choice (fruit, chocolate, etc.)
  • Whole milk as needed

The simplest recipes have just a dairy base, sweetener, and flavors. Once you master the basics, you can create more complex mixes.

KitchenAid Mixer Equipment

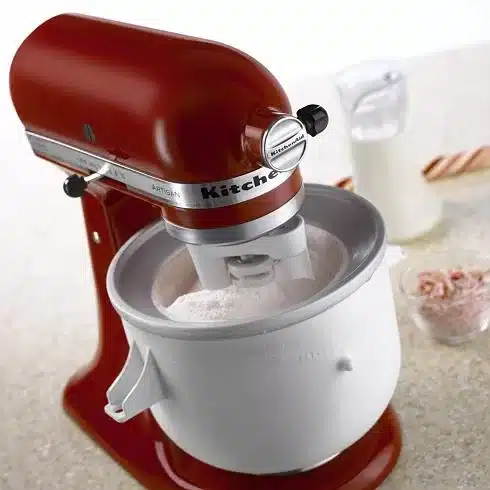
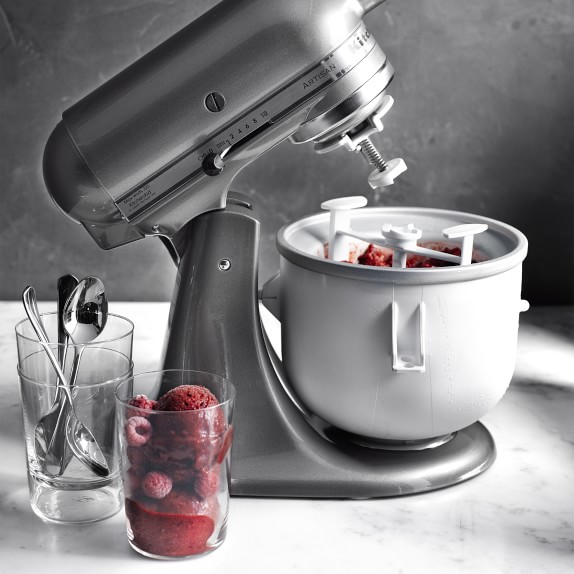
In addition to ingredients, you will need:

  • KitchenAid Stand Mixer
  • Metal bowl (at least 6 quarts)
  • Paddle attachment
  • Ice cube trays or shallow pan
  • Plastic wrap

The mixer does all the hard work of churning and aerating the ice cream. The bowl gets cold in the freezer to facilitate freezing.

Easy Homemade Vanilla Ice Cream Recipe

Step-by-Step Instructions

Follow these simple steps:

  1. Prepare the ice bath – Fill a large bowl or pan with ice and water. Place the mixer bowl in the ice bath. Allow to chill completely, at least 2 hours.
  2. Mix the dairy base – In the Stand mixer bowl, combine heavy cream, sugar, and salt. Whip on medium-high until light and fluffy, about 2-3 minutes.
  3. Add flavorings – Mix in extracts, cocoa powder, mashed fruit, or any other flavors. Taste and adjust sweetener if needed.
  4. Adjust consistency – For a richer ice cream, add more cream. For lighter, add whole milk until desired consistency is reached.
  5. Transfer to ice cube trays – Pour mixture into trays, leaving space for expansion. Cover tightly with plastic wrap.
  6. Freeze overnight – Place trays in freezer overnight or at least 6 hours until solid.
  7. Blend cubes in mixer – Remove ice cream cubes from trays and transfer to chilled mixer bowl. Mix on low setting until creamy, 1-2 minutes.
  8. Return to freezer – Place soft ice cream in airtight container to freeze and harden, at least 2 more hours.

And that’s it – your very own homemade ice cream ready to serve! The hands-on time is less than 30 minutes. Just be sure to plan ahead.

Serving & Storage Tips

Homemade ice cream is best within 1-2 days. For serving, let it sit at room temperature briefly until just soft enough to scoop. Here are some storage tips:

  • For the creamiest texture, keep stored at 0°F or colder.
  • Place plastic wrap directly on surface before sealing container to prevent ice crystals.
  • Store flavors separately or layer if combining more than one.
  • Eat within 1 week for best quality and taste.

Now you’re ready to experiment with delightful frozen creations. Try classic flavors or get adventurous with unique ingredients.

Pin on Party Planning

Frequently Asked Questions

What if I don’t have an ice cream maker?

No problem – the KitchenAid mixer method works great without an ice cream machine. The bowl needs to chill fully in an ice bath, but the mixer does all the churning for you.

Do I have to use a KitchenAid mixer?

While a KitchenAid makes the process easier, any electric stand mixer with a bowl that can chill fully should work. You can even use a hand mixer and freeze in a separate container. Just be prepared for more arm work!

What dairy should I use?

Whole milk or a mix of cream and milk make smooth and creamy ice cream. For richer taste, use more cream. You can play around with dairy alternatives like soy or almond milk as well.

Wrapping Up

Making your own ice cream is incredibly rewarding and easier than you imagined with the right tools on hand. All you need are simple ingredients, a little patience for freezing, and a KitchenAid mixer to do most of the churning work for you.

Get creative with your favorite flavors or seasonal ingredients. Part of the fun is experimenting and customizing to your tastes. Impress your guests with artisan frozen treats they won’t believe you whipped up right in your own kitchen.

Meet

Dale

Dale is the founder and appliance expert behind PressToCook.com. He is a former restaurant manager who has spent years behind the scenes using just about every kitchen appliance imaginable.

He founded PressToCook.com to debunk the myths around appliances and show home cooks how to truly harness the power of their gadgets to whip up incredible dishes easily and efficiently.

Dale is on a mission to prove that kitchen appliances should be celebrated, not feared, and he can’t wait to share his real-world tips and tricks with you!
© 2024 PressToCook.com. All rights reserved.

Site built by LaowaiSites