If you have a GE freezer that is not cooling properly, making loud noises, or leaking water, you may need to access the back panel of the freezer to troubleshoot or fix the problem. The back panel of the freezer covers the evaporator coil, the defrost heater, the fan, and the drain.
These are some of the most important components of your freezer that regulate the temperature, airflow, and moisture. In this post, we’ll show you how to remove the back panel of a GE freezer in a few simple steps, using only a screwdriver and some care.
Why Remove the Back Panel of a GE Freezer?
There are several reasons why you might want to remove the back panel of a GE freezer. Some of them are:
- You want to clean the evaporator coil and the drain, which can get clogged with ice or debris over time, affecting the cooling performance and causing water leaks.
- You want to test or replace the defrost heater, which is responsible for melting the frost on the evaporator coil during the defrost cycle. If the heater is faulty, it can cause excessive ice buildup or no cooling at all.
- You want to test or replace the fan, which circulates cold air from the evaporator coil to the freezer and refrigerator compartments. If the fan is noisy, not spinning, or not working properly, it can cause uneven cooling or warm temperatures.
- You want to inspect or repair any wires or connectors that may be damaged or loose behind the back panel.
Whatever your reason, removing the back panel of a GE freezer is not a very difficult task, as long as you follow the instructions carefully and use the right tools.
How to Remove the Back Panel of a GE Freezer: Step by Step Guide
The following guide applies to many GE freezers, but some models may have different features or configurations, so it’s always a good idea to check your owner’s manual before attempting any repairs or modifications. If you’re not sure how to remove the back panel of your GE freezer, you may want to contact a professional service person for assistance.
Here are the steps to remove the back panel of a GE freezer:
- Unplug the power cord from the power outlet. This is an important safety precaution to avoid any electrical shocks or injuries.
- Open the freezer door or remove the freezer drawer. See Bottom Freezer Refrigerator – Removing Freezer Drawer for more details on how to remove the drawer.
- Remove the ice bucket and freezer baskets. You may need to lift them up and out of their slots or tracks.
- Locate the screws that hold the back panel in place. There are usually four screws along the top and bottom edges of the panel.
- Remove the screws with a flathead or crosshead screwdriver. Keep the screws in a safe place for later use.
- Grab the end corners of the panel with your fingertips.
- Pull up and out to remove the panel from the bottom track of the fridge. If the panel is still stuck, you may need to defrost the freezer more. There are several connectors from the back panel to the fridge that will need to be unplugged to remove the whole back panel.
That’s it! You’ve successfully removed the back panel of a GE freezer. Now you can access the evaporator coil, the defrost heater, the fan, and the drain.
How to Replace
the Back Panel of a GE Freezer
To replace the back panel of a GE freezer, you’ll need to reverse the steps above. Here’s how:
- Plug in any connectors that you unplugged from the back panel to the fridge.
- Align the bottom edge of the panel with the bottom track of the fridge.
- Push in and down to secure the panel in place.
- Replace the screws on both sides of the panel with your screwdriver.
- Replace the ice bucket and freezer baskets by sliding them into their slots or tracks.
- Close the freezer door or replace the freezer drawer.
- Plug in the power cord to the power outlet.
Congratulations! You’ve just reinstalled the back panel of a GE freezer.

FAQs About Removing
the Back Panel of a GE Freezer
Here are some common questions and answers about removing the back panel of a GE freezer:
- Do I need to defrost my freezer before removing the back panel? It depends on how much ice buildup there is on the evaporator coil and the back panel. If there is too much ice, it can make it difficult or impossible to remove the panel without damaging it or the fridge. You can try to defrost your freezer by unplugging it and leaving the door or drawer open for several hours or overnight. You can also use a hair dryer, a steamer, or a towel soaked in hot water to speed up the process, but be careful not to damage any wires or components with heat or water.
- How do I test or replace the defrost heater, the fan, or the drain? To test or replace the defrost heater, the fan, or the drain, you’ll need to use a multimeter, a continuity tester, or a voltage tester to check for any faults or breaks in the circuits. You’ll also need to follow specific instructions for each component, which may vary depending on your model and type of freezer. You can find more information on how to test or replace these components on our website or on YouTube.
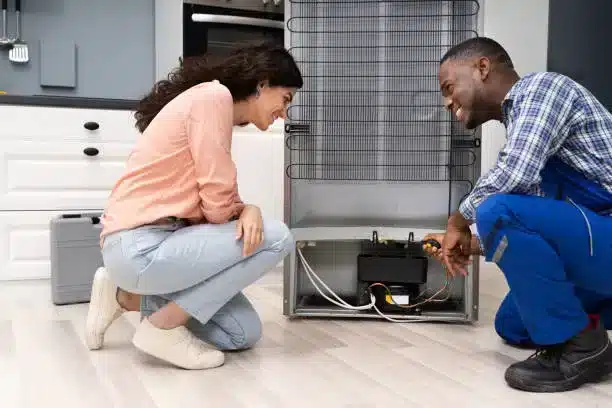
- Can I remove the back panel of a GE freezer by myself? Yes, you can remove the back panel of a GE freezer by yourself, but it might be easier and safer to have someone help you lift and hold the panel while you unscrew and detach it from the fridge. You should also wear gloves and eye protection to avoid any cuts or injuries from sharp edges or ice.
Conclusion
Removing the back panel of a GE freezer can be a simple and useful project that can help you troubleshoot or fix any problems with your freezer’s cooling performance, noise level, or water leakage. All you need is a screwdriver and some care, and you can remove the panel in a few easy steps. Just remember to check your owner’s manual for any specific instructions or precautions for your model, and contact a professional service person if you’re not sure how to proceed.