
If you have a Whirlpool freezer, you may want to replace the light in it from time to time for better visibility, safety, or aesthetics. Replacing the light in a Whirlpool freezer is not a hard task, but it does require some care and attention. In this blog post, we’ll show you how to replace the light in a Whirlpool freezer and what type of bulb to use.
To replace the light in a Whirlpool freezer, you need to unplug the freezer, remove the light shield, unscrew the old bulb, screw in the new bulb, and replace the light shield. You need to use an appliance bulb of the same size, shape, and wattage (no greater than 40 watts) or an LED rated for wet/damp locations.
Replacing the light in a Whirlpool freezer is not a complicated task, but you’ll need to follow some instructions and precautions. The following steps will guide you through the process of replacing the light and preparing it for use again.
The first thing you need to do before replacing the light is to unplug your freezer from the power source. This will prevent any electric shocks or damage to the appliance. Locate the power cord and pull it out of the wall outlet. Make sure you have enough space and light to work on your freezer.
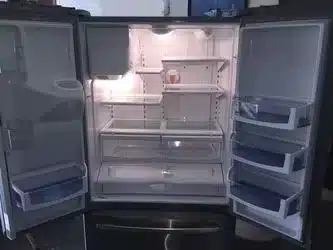
The next thing you need to do is to remove the light shield that covers the light bulb. The light shield is a plastic or metal piece that protects the bulb from damage and diffuses the light. Depending on your model of Whirlpool freezer, it may be held in place by clips, screws, or snaps.
To remove it, squeeze the lens from the sides, push it back and pull it down. You may need to use a flathead screwdriver to pry off the clips or snaps. If there are screws holding the shield, use a Phillips screwdriver to loosen and remove them. Keep track of the screws and clips for later use.
Once you have removed the light shield, you can unscrew the old bulb from its socket. Be careful not to touch or break the bulb as it may be hot or fragile. Use a cloth or glove to grasp the bulb and turn it counterclockwise until it comes out. Dispose of the old bulb properly.
Now you can screw in the new bulb into your Whirlpool freezer. Make sure that you use an appliance bulb of the same size, shape, and wattage (no greater than 40 watts) or an LED rated for wet/damp locations. Not all appliance bulbs or LEDs will fit your freezer.
To screw in the new bulb, use a cloth or glove to grasp it and turn it clockwise until it is snug. Do not overtighten or force it as it may damage the socket or break the bulb.
The last thing you need to do is to replace the light shield that covers your new bulb. Align it with its slots or holes and snap, clip, or screw it back into place. Make sure that it is securely attached and does not interfere with your freezer door.

When replacing your Whirlpool freezer light bulb, you need to use an appliance bulb of the same size, shape, and wattage (no greater than 40 watts) or an LED rated for wet/damp locations. Not all appliance bulbs or LEDs will fit your freezer.
You can find out what type of bulb your Whirlpool freezer uses by checking your user guide or owner’s manual. You can also look at your old bulb for its specifications or markings. You can buy a replacement bulb from an authorized dealer or online.
Some common types of bulbs used for Whirlpool freezers are:
Q: How do I know if my Whirlpool freezer light bulb is burned out?
A: The easiest way to know if your Whirlpool freezer light bulb is burned out is to check if it turns on when you open your freezer door. If it does not, then it may be burned out or loose. You can also check the bulb for any signs of damage, such as cracks, black spots, or broken filaments.
Q: How do I reset my Whirlpool freezer light?
A: Some models of Whirlpool freezers have a light switch that controls the light in your freezer. If your light does not turn on when you open your freezer door, you may need to reset the switch. To do this, locate the switch on the top or side of your freezer and press it several times. If the light still does not turn on, you may need to replace the bulb or the switch.
Q: How do I clean my Whirlpool freezer light?
A: To clean your Whirlpool freezer light, you need to remove it first by following our easy guide above. Then, wipe it with a damp cloth and mild soap or detergent. Rinse well and dry with a soft cloth or towel. You can also use a non-abrasive cleaner or baking soda solution for stubborn stains or odors.
Replacing the light in your Whirlpool freezer is a simple task that can improve your visibility and safety in your freezer. By following our easy guide, you can replace your light in minutes and enjoy a bright and clear freezer.

